Douglas County, Georgia will begin accepting electronic files for the purpose of sign plan review. The following article will show the process by which to submit electronically for your permit.
Step 1. Create a User Account
In order to begin, you must register an account with ePs thru the Douglas County / ePs website. Go HERE and select “Register new Account”. Complete the information and submit. You will receive TWO confirmation emails, one from Amazon Webs Services (this allows us to send you email), and two a User Confirmation Email from ePs that activates your account.
Step 2. Compete the Application
Login to ePs HERE and select “New Project”. Complete the application and select “Submit”
The application contains some required information indicated by * and bold text, other information should be completed as necessary. The applicant should make every attempt to provide the County with complete and accurate information. Failure to do so may delay the review process. Here are some application hints.
- To get the latitude and longitude of the project location use google maps / find your location / right click / select “What is Here” / coordinates will be displayed on your screen. Select Here for short video demonstration.
- Land Lot – District – Section – Parcel Number are not required information, However you can find it by using the Douglas County GIS website.
- It is acceptable to enter “Unknown at this Time” for required fields that you do not have the information.
Step 3. Payment
After the submission of the project data, ePs will create the “Project Page”. Prior to uploading plans, you will be required to pay the ePs fee of $10. To do this select the PayPal button on the page.
If you don’t have a PayPal Account you can select Pay with Debit or Credit Card. Once payment has been received by ePs, your project status will change to “Open to Files”. This process generally takes five to ten minutes. If the project status hasn’t been updated within that time please email us.
Step 4. Uploading your files
Once Payment has been received, from your Project Page, select the blue “Manage Files” button. This will navigate to the “File Management” page. Select “Upload”, then select your files. (Files should generally be adobe pdf files, however image files and other types may be accepted)
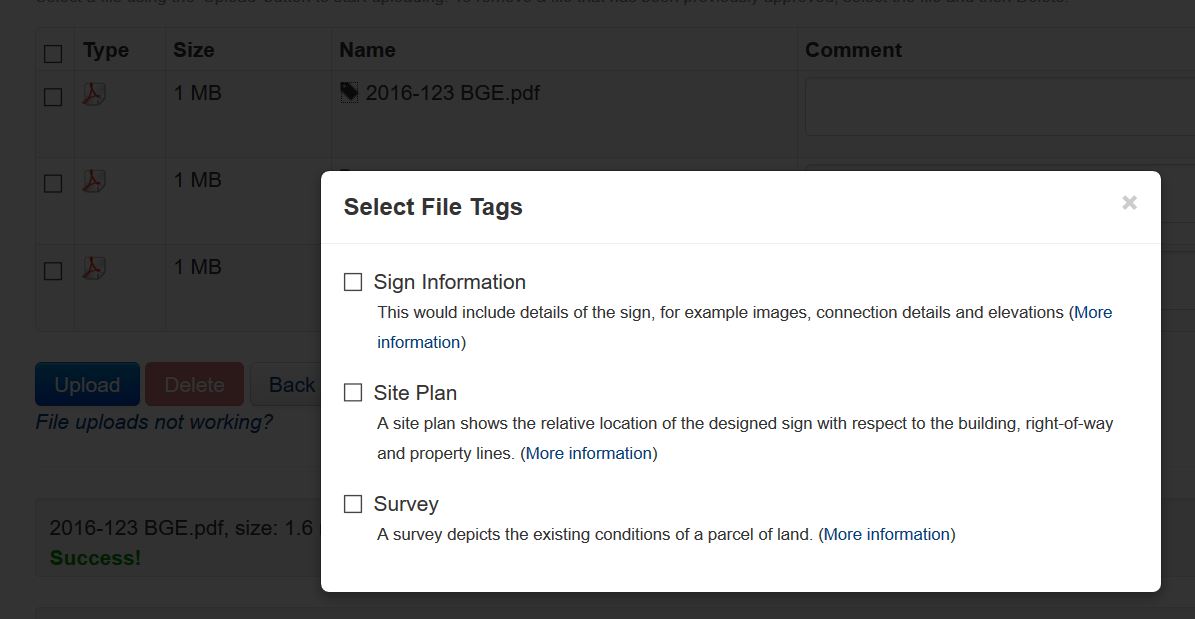
Once the files are uploaded, you need to apply the “Tag” to the file. This will help the plan review identify which files are associated with the information that they will review. To select the tag, select the Tag icon to the left of the file name. Select the check box that most accurately describes the file and then click back on the main screen of select the “x”.
Then submit them for review by selecting the Submit for Review button


